Insulate Your Home with our Step-by-Step Guide
We are almost half way through August now and looking forward to the winter ahead (sorry…). It is the perfect time to get ideas about how to prepare your house in the coming months to face the cold spells ahead.
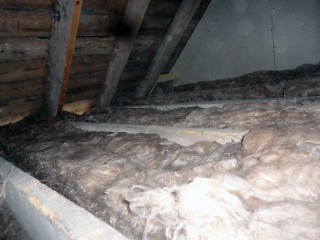
A house without insulation loses large amounts of heat through the windows, walls, roof and doors. Loft insulation will have the biggest impact on retaining heat in your house. Your loft should have at least a 270mm depth of insulation to minimise heat loss and an upgrade to this could save up to 15% on your heating bills! The insulation needs to stay uncompressed, without heavy storage above it as this reduces the efficiency. If insulation is already in place, the old layers of insulation can be topped up with fresh loft roll.
Installing new loft insulation isn’t too difficult and can easily be a DIY project. Here’s our helping hand for the steps you need to take and consider during the project:
- Safety first! Make sure you wear a mask, goggles and gloves when working in the loft and handling the insulation.
- Before you start insulating, you will need to make sure the pipes and water tank are insulated as the loft temperature will drop with the extra insulation and the water could freeze. You can wrap pipes in loft insulation and also fit it around the tank. Alternatively, you can buy tank jackets to save you a bit of work.
- Find the length and width of the loft to calculate how many rolls you will need. If you’re fitting between joists then you will need to measure the width of the gap also.
- It can be easier to cut the lengths to size before lifting them in to the loft to lay them. Rolls come in a wide range of widths but if they need trimming down, it is easiest to do with a knife! You can use two off cuts of board to create a straight cut.
- Use two walk boards so you can stand on one and move the other in to place to work your way around the loft.
- Starting in the corner, leave a 25mm gap between the roll and eaves for ventilation. If there is no insulation already, the first layer should have 100mm thickness between the joists.
- Roll the lengths out and when they run out, start with a new roll and place the ends tightly together. Push the insulation down, against the joists without too much compression and move on to the next roll.
- Once you have finished the first layer, repeat the same process for the second layer placing the rolls at a 90 degree angle to the rolls underneath.
- Once the loft is complete, make sure the hatch is well insulated! You can fix the insulation with nails or staples to stop heat being lost through the door.
Feel free to get in touch with us if you need any advice on the project and the best materials and tools for the job. Check out our special offers on rolls of Superglass loft insulation here.