Guttering Fixing Step-by-Step!
At Atlantic Cladding we have a wide variety of guttering products, which comprise of many different styles, shapes, colours and sizes! So much so that we are confident, that we will have the guttering and accessories in stock to replace your old tired guttering, and giving a new lease of life to the outside of your house. Below you will find some simple steps and tips for replacing your guttering.
Precautions and Safety
If you are at all unsure about the sturdiness of your roof, guttering or equipment, always get a professional in for the job! If you are happy to go ahead, then ensure the right safety precautions are in place; correct weather, correct clothing, and good quality tools, and equipment.
Remove Guttering
- At either end of a section of guttering, hammer in large nails to the fascia board to stop it from falling down
- Where the sections join, cut through the bolts and tap them out.
- Tie rope around each end of the guttering, break apart the joint and unscrew the brackets holding the section to the fascia
- Lower the gutter to the ground with the rope and repeat on other sections in manageable lengths.
Fitting New Guttering
- Fit the gutter bracket near the top of the fascia board at one end and tie a builder’s line or string around the base. Use a plumb line to ensure the outlet is positioned corrected and mark the position with a pencil – the outlet should be no more than 50mm below the roof tiles!
- Atlantic Cladding stock the Freeflow Rainwater Systems, and it is suggested the fixings are secured using a minimum size of 6mm x 25mm roundhead screws – non-corroding, zinc-plated, stainless steel or similar.
- Use the string-line to ensure a straight gutter – this can be level or laid to a fall. A gutter with a fall will increase flow capacity, and the area of the roof that can be drained.
- Go along the line and mark the position of brackets at 1m intervals and within 150mm of any joint or fitting.
- Fit the rest of the brackets and start snapping the gutter in to place. Continue fitting additional gutter lengths, and cut to size ensuring stop ends are in place.
NOTE: Atlantic Cladding supply adapters so this work can be done to repair, replace or extend existing gutter systems!
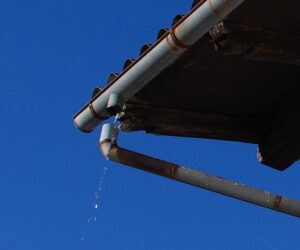
Fitting Downpipes
- Use a plumb line to mark a vertical line on the wall from gutter outlet to the drain. Work along the line marking fixing holes for downpipe clips a maximum of 1.8m apart.
- Drill the holes to manufacturer guideline size (Atlantic Cladding recommend 6mm x 25mm) and fit wall plugs.
- Fit the first length of downpipe ensuring you leave a 10mm gap between the outlet and bottom of the socket to allow for thermal expansion. Secure this with a socket clip and screw in to the wall plugs.
- Continue this along the length of the downpipe. Finally, fit the shoe to the bottom of the pipe so water is filtered in to the drain and secure with a final socket clip.
For full details and specifications of fitting the gutters sold at Atlantic Cladding, have a look at the full fixing guide here.